
Overmolding Electronics with 3D Printed Molds
There’s lots of talk these days about printing tooling for short run injection molding, or printing rigid molds for silicone casting.
One unique application is low volume, flexible 3D printed molds for rigid overmolding of electronics.
In this blog post we’ll cover how we used SLA 3D printing to make flexible molds that allowed us to overmold electronics for a polar bear tracker. This was a project done in collaboration with Mistywest and you can read about the project specifics here.

Overmolding
Overmolding of electronics is seen in a lot of places. A good example is the overmolding you commonly see over a USB cable, or in this example, over the pcb of an ethernet adapter. Picture taken from Gluespec.

The Device
A rendering of the polar bear tracker showing the overmolded casing and the PCBA inside. overmolding is crucial for an application like this to ensure the device is protected from all environments.
Tracking Bears
A rendering of the device attached to the ear of a polar bear. This device will enable researchers to more effectively track polar bears and their migration patterns during challenging times as climate change affects their habitat.
A traditional approach to overmolding a device like this would involve either insert molding at the injection molding stage (which doesn’t make sense for a low volume device like this), or the following steps:
Manufacturing of a rigid positive pattern - made by CNC’ing or 3D printing
Mixing and casting of soft silicone to create a negative mold
Casting of rigid resin into the mold with the electronics to produce the desired part

Silicone Molds
This is an example of a casted silicone mold. This picture is of a urethane casted rigid part, but the idea is similar. A 3d printed or cnc’ed master is created, then used to make the silicone mold. the silicone mold is cut open and then used to cast the final part. Picture taken from 3ERP.
3D printing of the flexible molds opens up an accelerated workflow for this example, and you can go from print to overmolding in a day. There are, of course, caveats and these are summarized below:
Because of limitations with flexible/soft SLA materials, these materials often don’t have great resolution. For example, the Formlabs Elastic 50A resin we used had a minimum layer resolution of 100um, whereas rigid resins can go down to 25um.
The lifetime of the mold is typically lower than that of silicone as these flexible SLA materials usually have a poorer tear strength than real silicone.
Since this involves printing two flexible mold halves separately, the tolerances for where the split line meets can be loose. This means you can get more flash at the split line than in traditional overmolding.
Even given the above limitations, this polar bear tracker was a unique application that lent itself perfectly to this prototyping/manufacturing technique. Below are some pictures of the mold & final device.

Elastic 50A Mold
These parts are printed out of Elastic 50A from formlabs. This materials allows one to peel the mold off a rigid casted part.
As mentioned previously, a downside to this path is that we are limited to resolution on elastic parts, meaning you can still see faint layer lines on certain faces of the part. It’s also impossible to polish the mold .
aligning shutoff surfaces on elastic molds is difficult because the mold is flexible and printed in two separate pieces. It’s difficult to achieve precise shutoffs and alignments like in injection molding, or urethane casting.

Clamping
The mold can be clamped using simple c-clamps. In this case, we made a separate clamping jig that was also 3d printed.
inside you can see the PCBA along with an SLS printed base structure.
It’s VERY important to use a mold release prior to casting your part - otherwise you will never be able to remove the mold from the part.
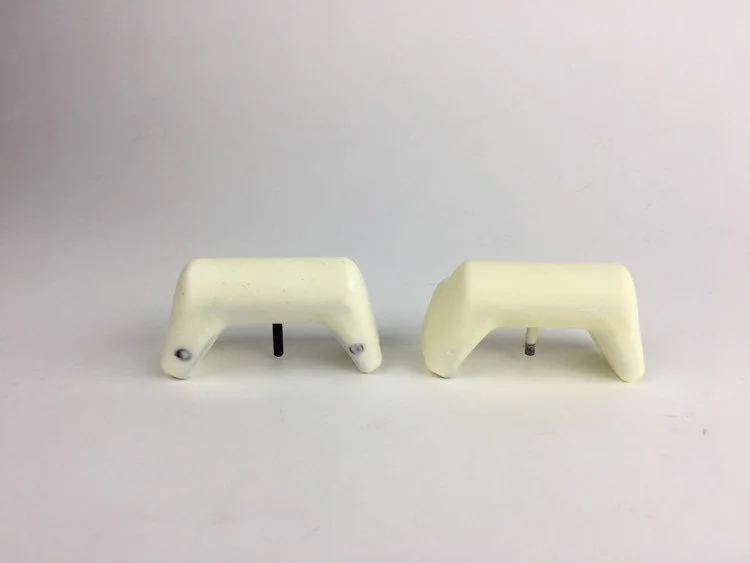
Final Part
the final over molded part resulting from the flexible 3D printed mold. The mold for this can be designed in a couple of hours, printed overnight, and parts overmolded the next day. Truly a rapid prototyping technique!